
The rabbit hole?
It comes from Alice in Wonderland, hence the dapper white rabbit in the picture. And it means when you go deep into learning about a particular subject and possibly, or not, end up in strange territory. Surely we’ve all done that at some point, right?
For the purposes of this article, we’re talking about the first bit. Sending your readers down a deep rabbit hole of discovery, where they can learn everything they want to know on a subject and have all their questions answered.
It starts with comprehensive content
If you want your readers to go deep, you need to have answers to all their questions — and even answers to questions they didn’t ask, but might ask when they’ve read your other content.
For that you need to anticipate their every need and create a comprehensive bank of content that covers all those eventualities.
But that’s a post for another day.
Today, we’re looking at how to use internal links to link your related content together. And create a big rabbit hole, full of interconnected tunnels for your visitors to explore.
10 Ways to set up your internal links
Let’s start setting up those tunnels and creating your content rabbit hole.
Here are some tips and ways to do it.

1. Create explainer content and link to it
As its name suggests, explainer content is content that explains stuff.
It’s a good idea to keep your explainer content separate from your other content. Because filling your other content with explanations will make it over-long and may cause readers who don’t need the explanations, to lose interest.
If you get to a point in your article where some readers might benefit from a further explanation, you can insert your internal link to the relevant explainer article.
2. Use content hubs
A content hub, also known as a topic cluster, is an excellent way to group related content. Using this structure means you can break up long content into shorter and more manageable articles.
The content hub structure looks like this. It has a main article, known as a pillar article, at its heart. This pillar article introduces and links to a series of sub-articles covering different aspects of the same topic.
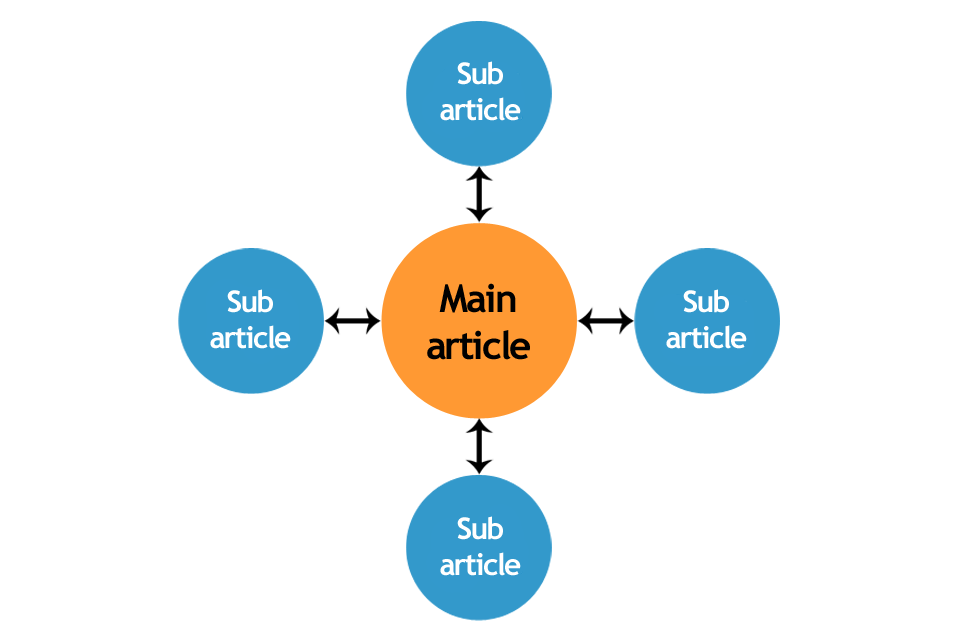
Image created by Jenny Lucas
Where it’s relevant, you can also link directly from each sub-article to different sub-articles in the hub.
You can read more about content hubs in my article: Content hubs: what are they and why should you be using them? >>
And there’s an explainer content link, like I mentioned in point 1.
Content hubs are fantabulous for your website’s SEO and help you build topic authority. Google likes that. It means users can find all their answers in one place. And you’d like them too if you were tasked with processing 99,000 queries every second.
3. Create a series
While content hubs revolve around a central pillar and you can add as much new content as you like, a series is a set of content that’s designed to be consumed in order.

A content series needs more planning.
For example:
- What topic is the series going to cover?
- What does it need to include?
- How many articles will it have?
When you have your series completed, each article can link to the next article, the previous article and the first article in the series.
4. Link to your category pages
Most blogs are organised into categories. My own blog includes categories like SEO, content creation and websites.
If your article is an introductory explainer and not part of a content hub, you can link to the relevant category page for readers to find more information on their chosen topic.
5. Link to popular posts
Some blogging platforms include a widget that displays the most read posts on the blog. This can be a good way to introduce visitors to your most popular content and win you new fans. Nice work! We love you! We’ll be back soon!
6. Link to related posts
If a visitor has enjoyed your article, they’ll probably be open to reading more. Adding internal links to other articles that might interest them will give them somewhere else to go. Some blogging platforms have a widget to show related content, like this, but I prefer to be more strategic.
I handpick the articles I think my audience will enjoy, or that will further their journey, and add these links manually. At the bottom of each article, I include a ‘You might also like…’ section with three related posts underneath. And when I audit my posts, I check those links to make sure they’re still the best ones for that particular article.
7. Use newer posts to link to older ones
If you audit your content regularly — and you should — it should all be current and relevant. But over time, fresh content is added and your older articles, though still valuable, are pushed to the bottom of the pile.
Linking to relevant older articles in your newer articles will ensure they keep getting traffic. This is an especially good tip where the older articles are high value cornerstone content, which could be a high authority resource.
8. Have a blog section on your homepage
Having a blog section on your homepage introduces visitors to your content from the start.
On my website, this section includes an introduction to the blog and details of the latest three articles.
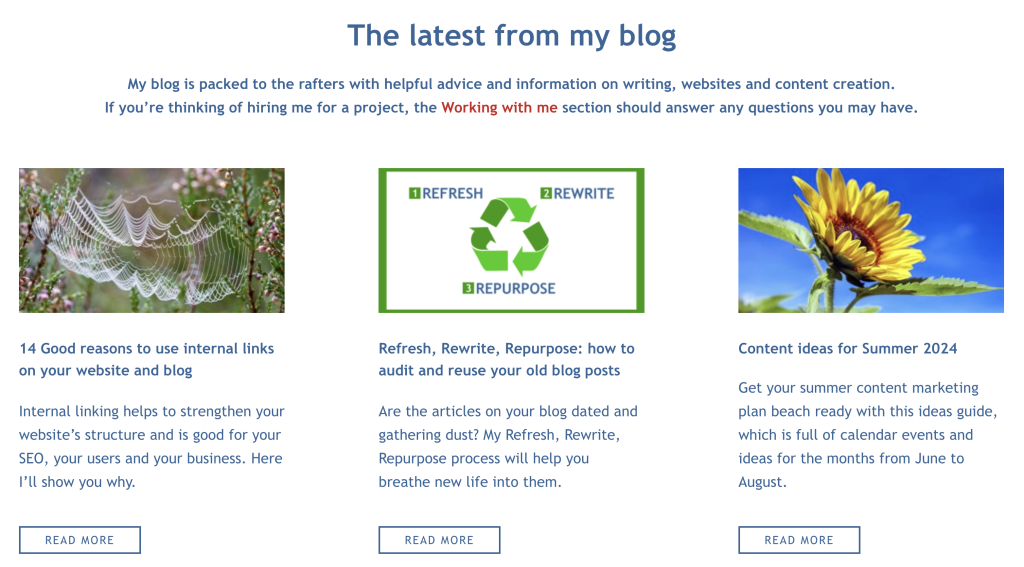
If you want to create something similar for your own site, there’s probably a widget for that.
9. Place links on your main pages
Some of the content you create will be useful to visitors at specific points in their customer journey. You can hyperlink to this content from your main pages.
For example:
- On my service pages there are links to full service guides
These guides explain my services and process in technicolour detail for anyone who wants to know. - With my copywriting brief download, I have a link to my guide to completing it
For anyone who’s worked with a copywriter before, my brief will be self-explanatory. But some people always need a little extra help. My post gives a walkthrough on how to complete it, with examples to make the process easier. - On my content page, I have a link to my pricing FAQs post
This post contains all my latest prices and frequently asked questions about my pricing. Asking visitors to check my pricing before they contact me prequalifies them and avoids those awks pricing conversations I don’t want to have.
10. Link to CTAs
CTAs, or calls to action, are links to specific actions you want your website visitors to take.
CTAs are designed to encourage your visitors to further engage with you, so they should be placed at relevant and appropriate points.
For example, that might be:
- Subscribing to your mailing list — a pop-up as they’re about to leave your site
- Downloading a lead magnet — on a relevant article
- Visiting a product/service/offer page — where content is aimed at people who are ready to buy
- Linking to your home or about page to learn more about you — where that might be beneficial to them
- Going to your contact page to make an enquiry — where that’s what they’re likely to want to do.
You might also like…


About the author
I’m Jenny Lucas, a freelance copywriter, content writer and website specialist, based in Leicestershire, UK.
Since I started my freelance copywriting business in 2011, my website has been my main source of clients.
Today, I help other businesses with SEO web copy and optimised blog content that helps them rank on Google, attract more of their ideal customers and make more money. Because, let’s face it, that’s what having a website is all about.
If you’re planning a new website, or refreshing your existing one, and need you some help with SEO copy or content, maybe I can help.
You can find out more about me and my services on my main website.